If you’re looking to send cold emails that land in the inbox and scale outreach without needing GSuite or complex setups, Deliveryman.ai has got you covered.
This guide will walk you through the entire process from signing up to launching your first cold email campaign.
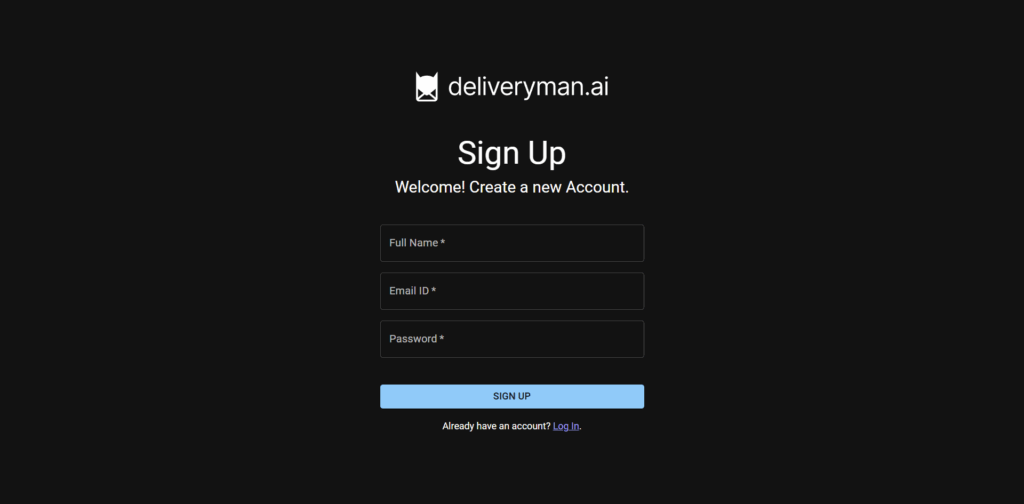
Step 1: Sign Up on DeliverymanAI
Head to Deliveryman.ai and create your account. It only takes a few seconds to get started.
Step 2: Connect Your Domain
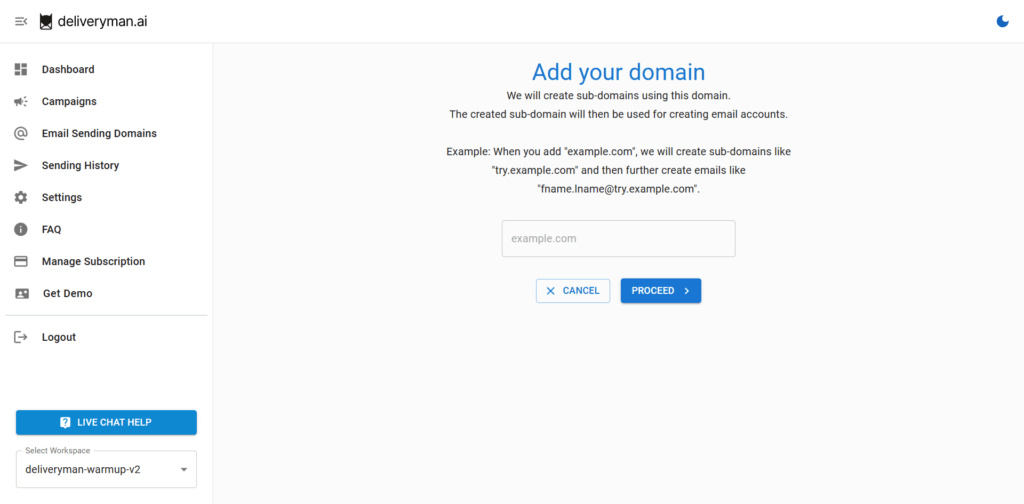
Once you’ve signed up, the first thing you’ll do is connect a domain.
- Go to the Domains tab.
- Click on Add Domain and proceed.
- Enter your domain name. (Example: domainname.com)
- Click on Proceed to confirm.
After this, you’ll get a list of NS records that you need to add to your DNS provider.
- Copy the NS records.
- Paste them in your domain’s DNS settings and Save/Submit the records.
P.S. It takes 5-10 minutes for the Domain Registrar to update the new records. In very rare cases it takes 48 hours.
To verify if your records are updated correctly or not, you can check on any of these websites.
If you’re facing trouble in adding NS records, here’s a quick tutorial on how to add NS records.
How to Add NS Records in Porkbun
How to Add NS Records in Hostinger
How to Add NS Records in Godaddy
How to Add NS Records in Namecheap
How to Add NS Records in Dynadot
How to Add NS Records in Cloudflare
Step 3: Set Up Mailbox Names
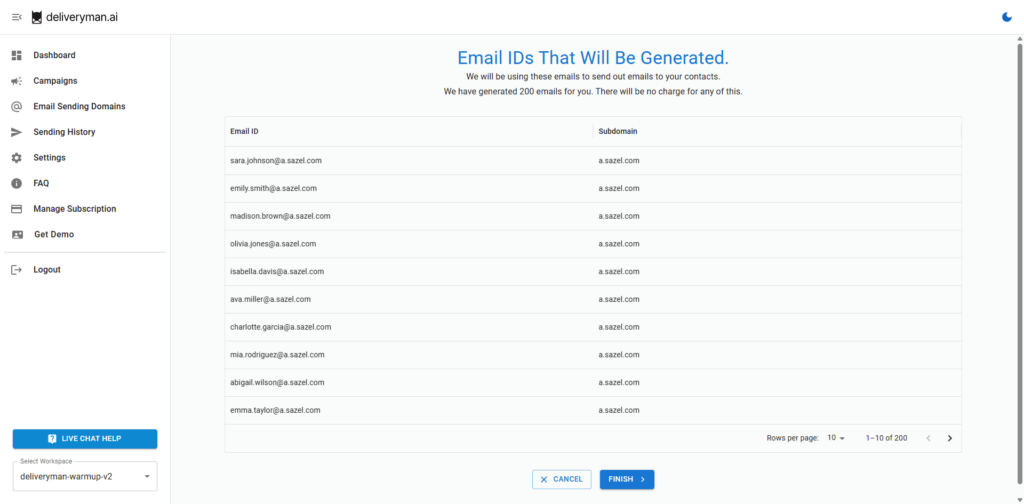
Once your NS records are verified, DeliverymanAI will guide you to the mailbox naming screen.
- Add a first name & last name (e.g., John Doe) that will be used to generate your email addresses.
- You can choose to randomize names based on countries or provide your custom first & last name that will be used across all the generated
DeliverymanAI will create 200 unique email addresses per domain using variations of that name.
- Click Finish to complete the setup.
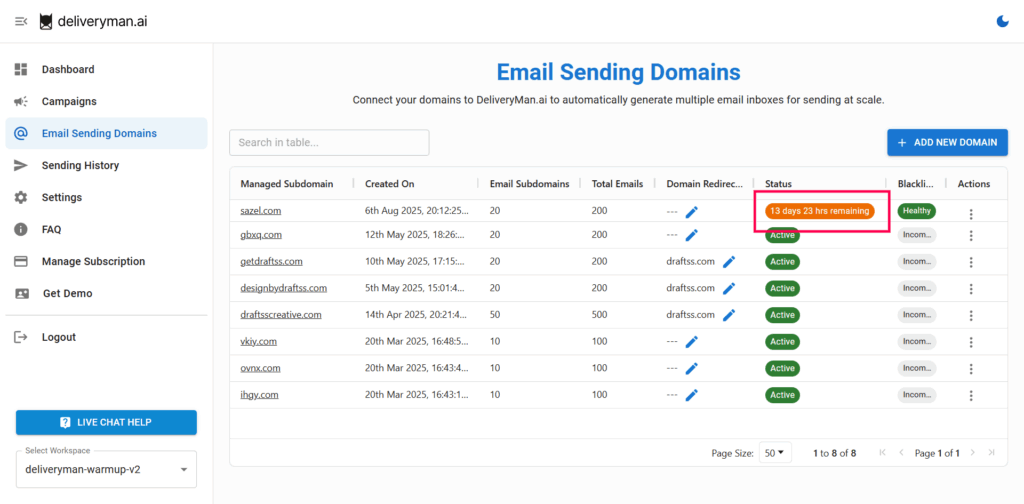
Step 4: Domain Reputation Building & Email Warmup
Newly added domains must go through a period of 14 days before they can send campaigns.
Once your domain reputations is sufficiently built up & your email warmup is complete, you can start scheduling and launching your campaigns.
Step 5: Create Your Email Campaign
Now you’re ready to create your outreach campaign.
5. A. Upload Your Lead List
- Click Create Campaign.
- Give it a name (e.g., SaaS Outreach).
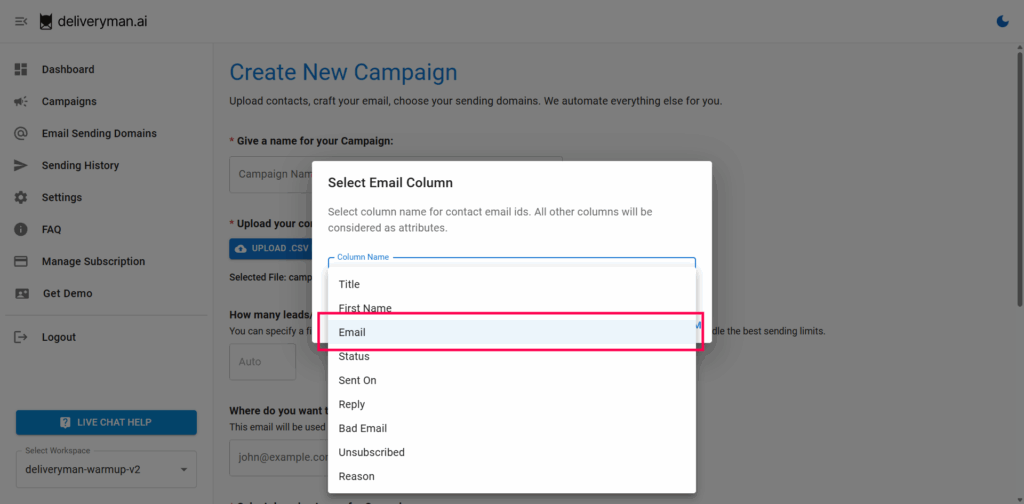
- Upload your CSV file with contacts.
- Select the column that contains Email Addresses of recipients.
5. B. Set Sending Limits
- Manually set a daily email cap (e.g., 20/day).
- Or leave it on Auto Mode, which adjusts based on domain health and reply/spam feedback.
Auto Mode increases your sending limit gradually (by 4-8% daily) while optimizing for deliverability.
5. C. Reply Settings
By default, all replies are automatically routed to your registered Deliveryman email.
But if you’d like replies to go to a different email address, you can set that up here too.
This can be any email address from gmail, gsuite, outlook, yahoo, etc.
5. D. Select Campaign Sending Days
You can choose specific days on which you want to send the email campaign.
You can toggle between Monday to Sunday and emails will be sent according to your selected days.
By default all days are selected, so email campaign will run everyday till the entire contact list is completed.
Step 6: Personalization & Spintax
DeliverymanAI supports the following features:
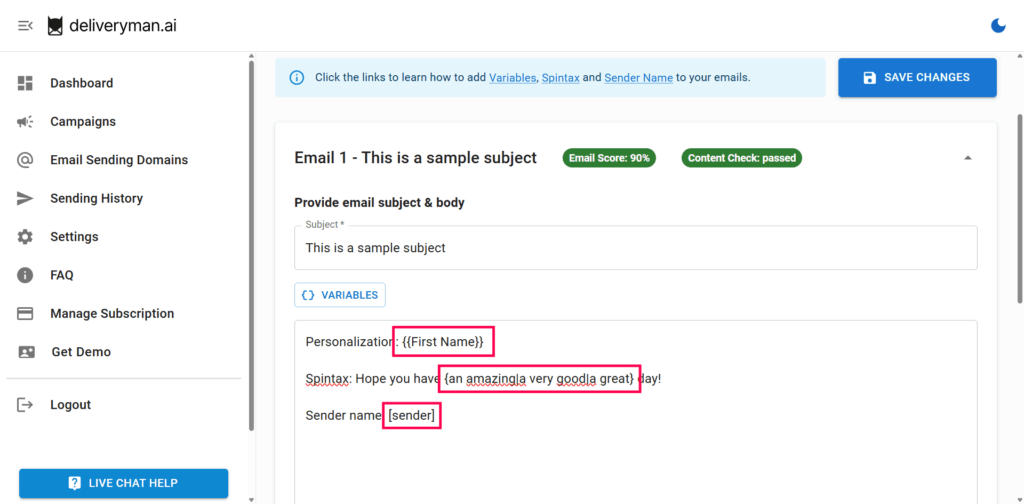
- Custom fields using double curly brackets. Example:
{{first_name}},{{company}}, etc.
If you want to import any other column in your email, you can do so by using covering the column name with double curly brackets.
- Spintax for variation using brackets with pipes at the start, in between and end.
Example: {hope you’re doing good|hope your week is going great|just checking in}
Each contact receives a slightly different version of the email, which increases engagement and reduces spam risk.
- Sender name function for adding the sender name within your emails.
You can use [sender] to add the full name of the sender within your email.
Step 7: Email Sequencing (Follow-ups)
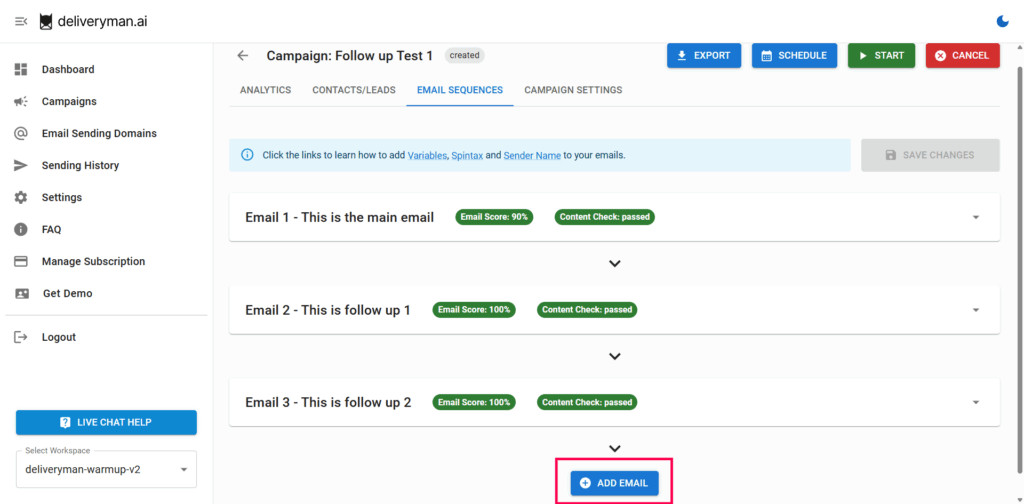
To increase reply rates, you can create a sequence of emails in your campaign.
Here’s how to do it:
- Add your main email by clicking on Add Email.
Once done,
- Write your follow-up message and choose the delay (e.g., send 2 days after no reply).
- Repeat to add 2–3 follow-ups for maximum reply rate.
If you use the same subject line, follow-ups will appear in the same email thread.
If the subject is different, each follow-up will start a new thread.
Step 8: Test Emails
Before launching your campaign, it’s highly recommended to send yourself a test.
Click Send Test Email to send a test email with mock data to your registered email.
To send a test email to another email address or multiple email addresses, go to Campaign Settings and add a custom test email address (e.g., your client or teammate).
You will receive an email with [TEST] at the end of the subject.
This helps you review formatting, personalization, spintax, and how the email looks in real inboxes before reaching your intended leads/contacts.
If your test emails are landing up in Promotions/Updates/Social, then you should tweak the content further so it can land within Primary Inbox.
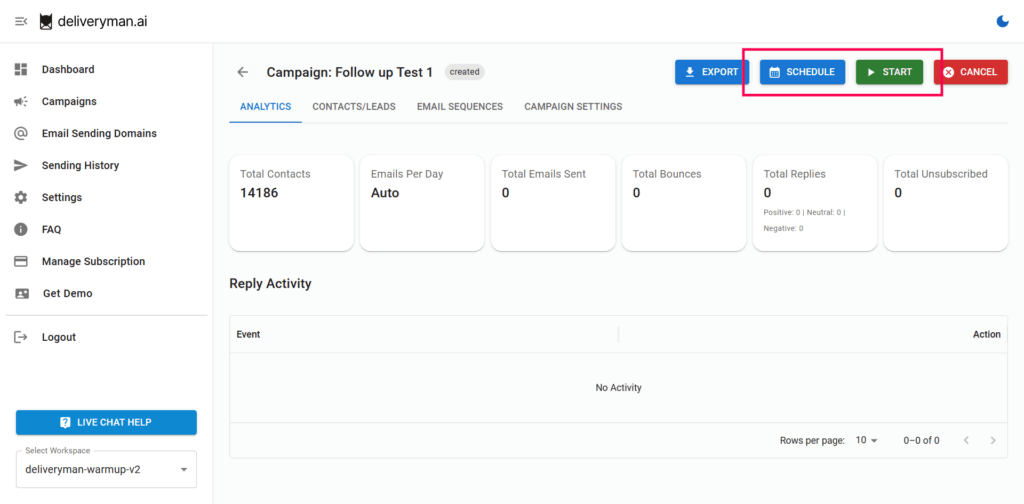
Step 9: Launch Campaign
Review your content and settings.
Choose your domains. (You will not be able to modify domains after starting the campaign)
Click Start Campaign or Schedule Campaign.
Step-by-Step Video Instructions
If you’re still facing any issues with Getting Started and need help, reach out to us via live chat on the DeliverymanAI website.

