
Every bad address on your contact list is a bounce waiting to happen, and bounces are one of the fastest ways to damage your sender reputation. That’s why email list verification is the first thing to do before any cold email campaign, not an optional extra.
In Deliveryman AI, email verification is unlimited on every plan. There are no credits to buy and no per-email fees, so you can verify every list, every time. This guide shows you how to verify an email list step by step, what each verification result means, and how to make sure risky addresses never get your emails. Prefer to watch? The full walkthrough is below.
Why you should verify your email list before every campaign
Mailbox providers watch how many of your emails bounce. A list full of dead addresses tells Gmail, Outlook and Yahoo that you don’t know who you’re emailing, and they react by sending more of your mail to spam. Google’s email sender guidelines and Yahoo’s sender best practices both make the point: keep your lists clean and your bounce and complaint rates low.
Lists also decay. People change jobs, companies shut down, and inboxes fill up. A list that was clean three months ago can bounce badly today. Verifying right before you send is the only way to know.
Clean lists pay off in three ways:
- Fewer bounces, which protects the reputation of your sending domains.
- Better inbox placement for everyone on the list, not just the bad addresses you removed.
- More accurate campaign numbers, because your open, reply and bounce rates are measured against real people.
How to verify an email list in Deliveryman AI
Step 1: Create a contact list
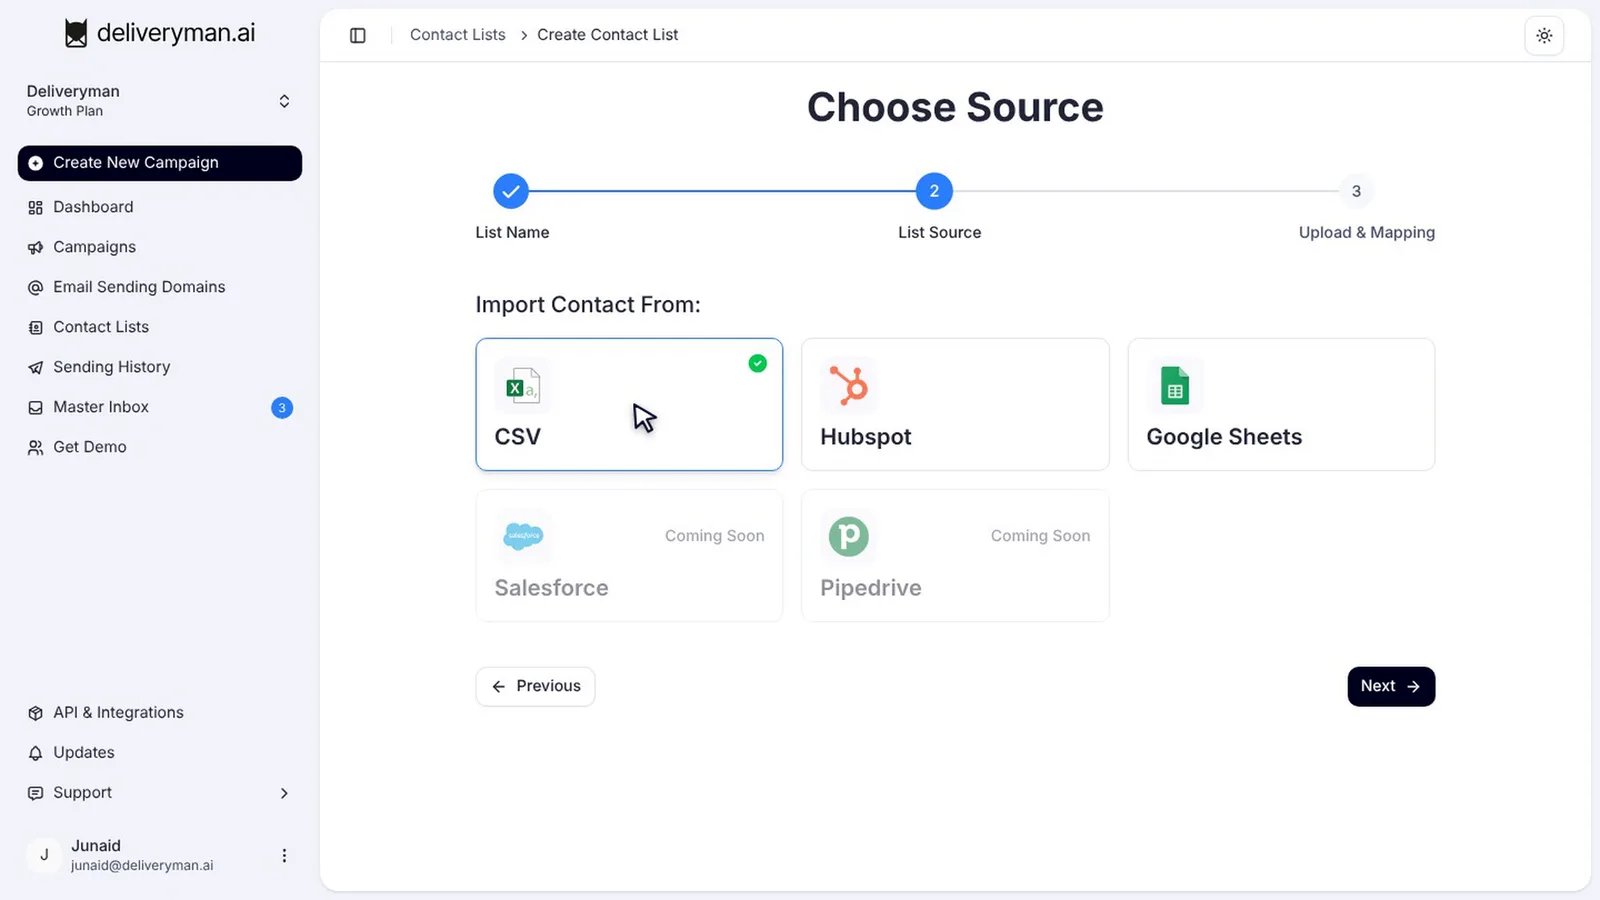
Go to Contact Lists and click Create New Contact List. Give the list a name you’ll recognise later, then choose where your contacts come from. You can upload a CSV file or import straight from HubSpot or Google Sheets.
Step 2: Map your columns
Drop in your file and Deliveryman maps your columns automatically. The only field you need is the email address. Anything else you include, like first name or company, becomes a variable you can use to personalise your emails later. When everything looks right, click Create this Contact List.
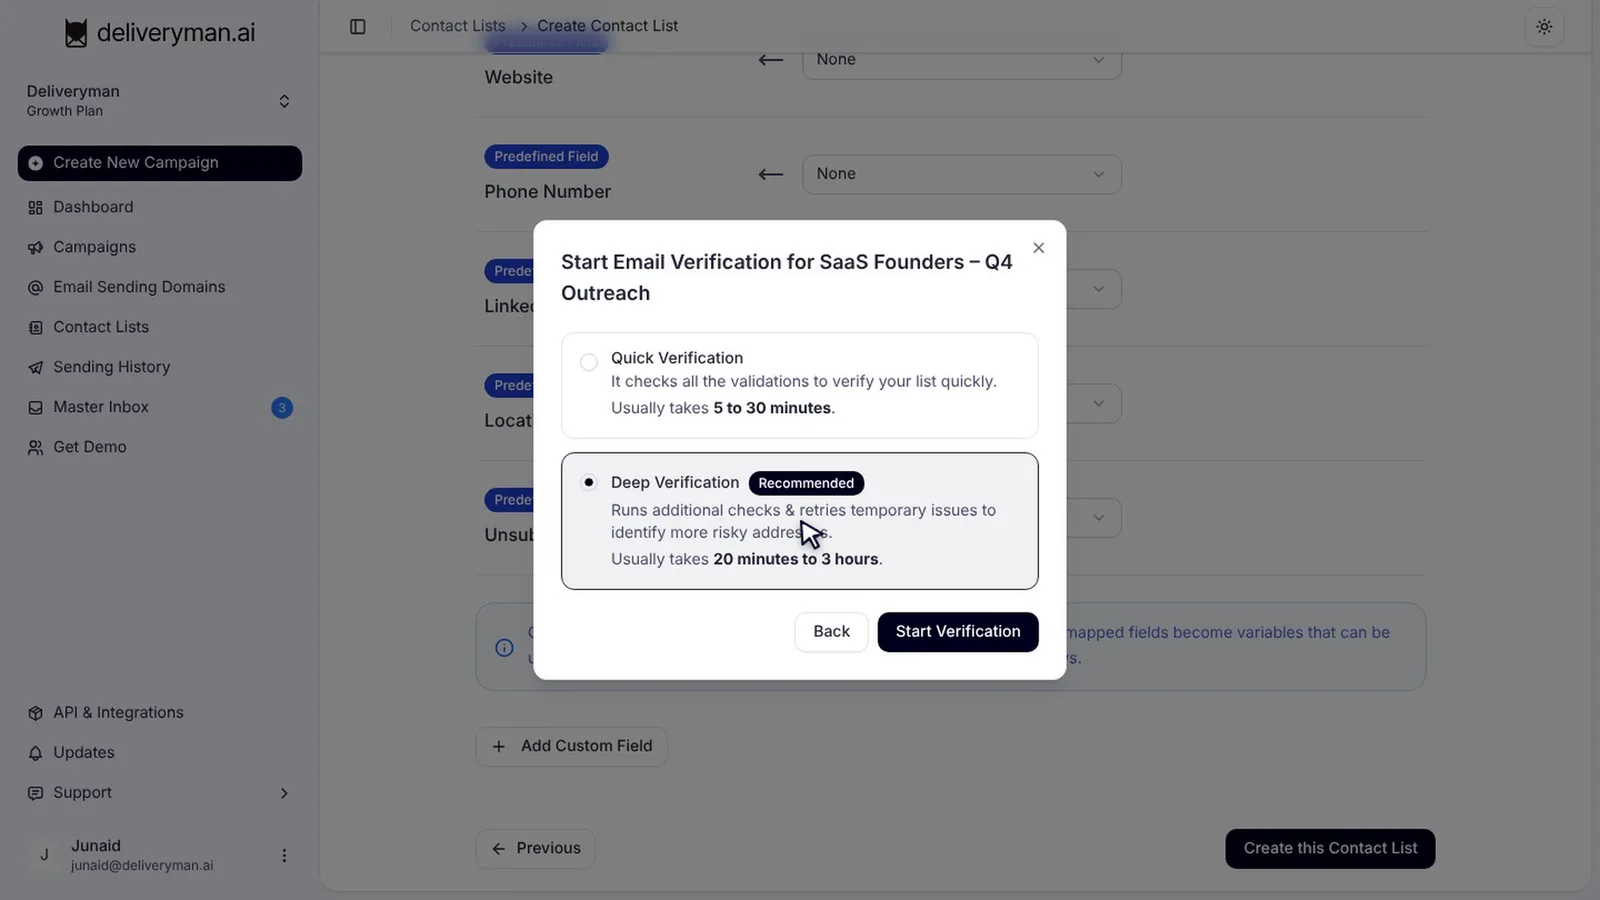
Step 3: Choose Quick or Deep Verification
Deliveryman asks if you want to verify the list. Click Yes, Verify this List, then pick a verification mode:
| Mode | What it does | Typical time |
|---|---|---|
| Quick Verification | Runs all the core validations | 5 to 30 minutes |
| Deep Verification (recommended) | Runs additional checks and retries temporary issues to catch more risky addresses | 20 minutes to 3 hours |
Choose one and click Start Verification.
Step 4: Let it run in the background
Verification runs in the background, so you can keep working. Open the list to watch it live: contacts are checked one by one and results appear right away. In a hurry? Click Skip to stop early and keep the results you already have. If you imported a list without verifying it, open it and click Verify List at any time.
How to read your verification results
When verification finishes, the summary cards at the top of the list break it down: total contacts, Safe To Send, invalid emails, unable to verify, inbox full, temporary, unsafe, catch-all and unverified webmail. Hover over any number to see the split by email provider, such as Google, Microsoft or Yahoo.
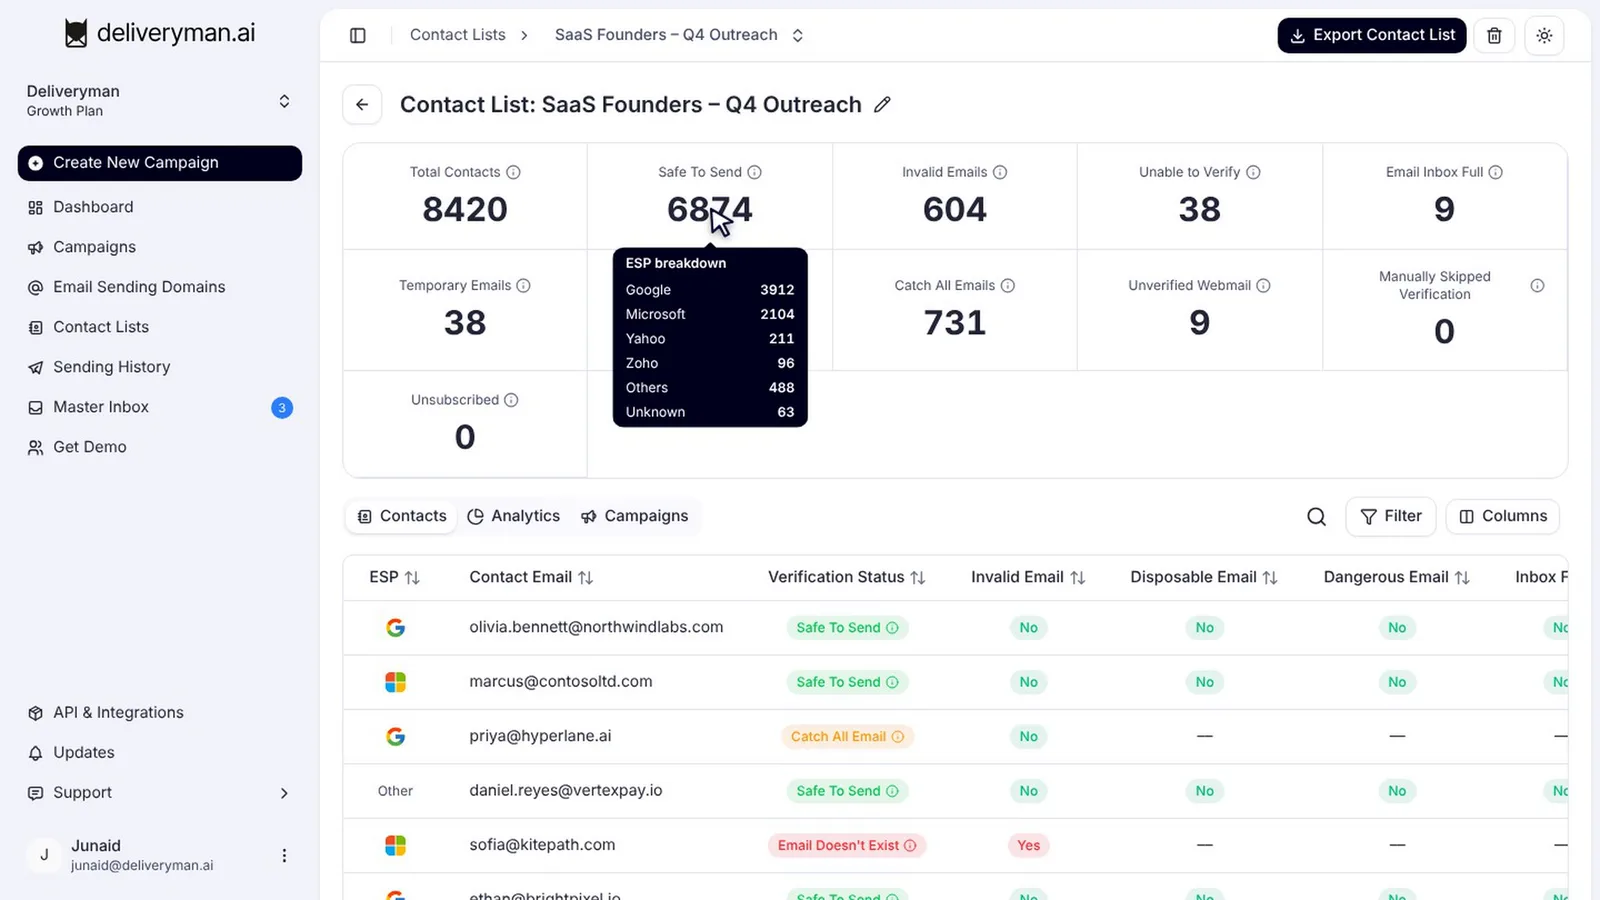
Every contact also gets its own status. They fall into three groups:
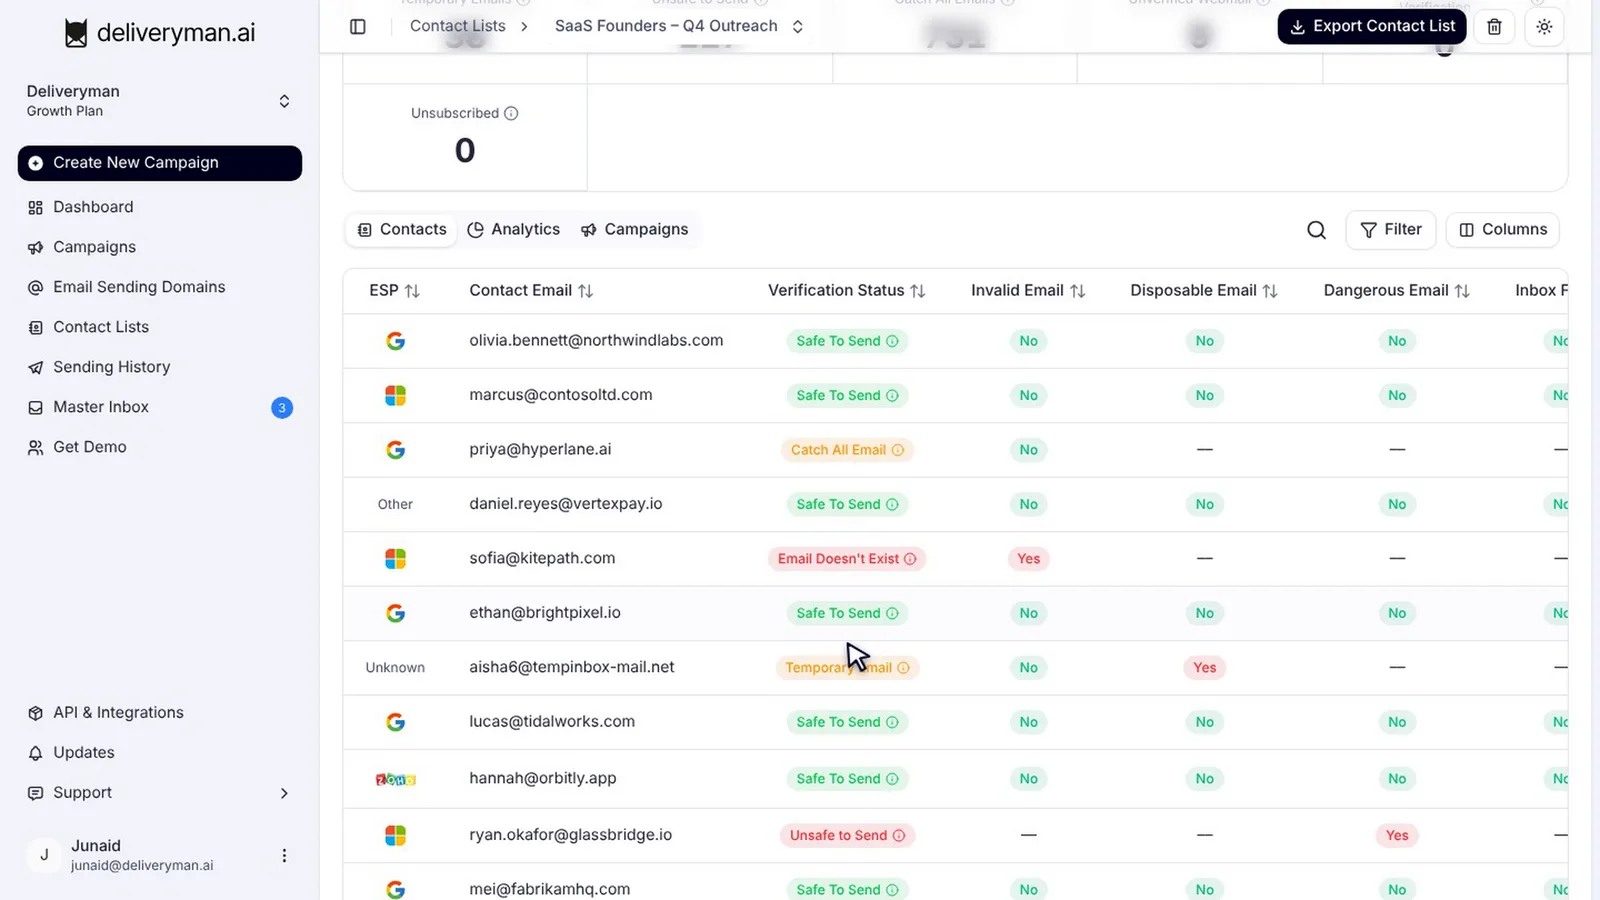
- Green: Safe To Send. The address exists and accepts mail. Send to it.
- Red: Email Doesn’t Exist, Not Email Format, Unsafe to Send. These will bounce or hurt your reputation, so leave them out.
- Amber: Catch All, Temporary Email, Inbox Full, Unable to Verify. These are risky. Use your judgment based on how valuable the lead is and how healthy your domains are.
There is also Unverified Webmail: a public email provider blocked the deeper checks. The domain is valid, but the mailbox itself can’t be confirmed.
For a deeper explanation of every result and what to do with it, read our guide to email verification statuses.
Filter and export a clean list
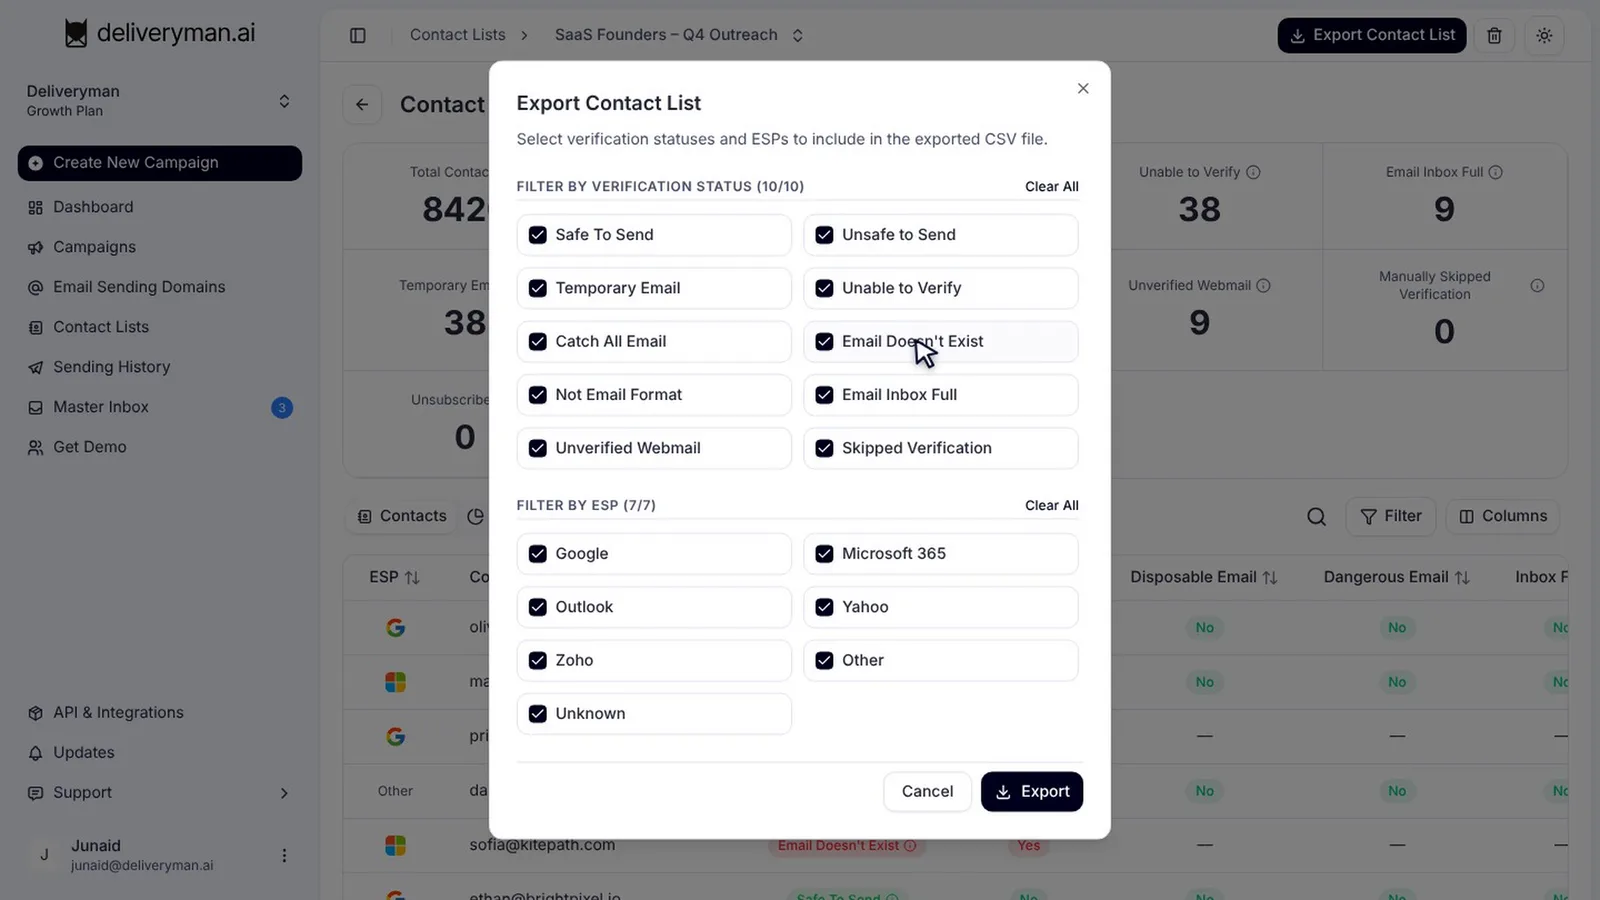
Use the filter to view contacts by verification status or email provider. Need a clean file for another tool? Click Export Contact List, pick the statuses you want to keep, and download a CSV.
Automatically skip risky emails in your campaigns
This is where verification pays off. You don’t have to clean your list by hand before every send. In your campaign, open Settings and go to the Email Verification tab. Safe emails are always sent. For every other status, flip a switch to send or skip.
Your campaign automatically applies the latest verification results, so risky addresses never get your emails, even if you verify the list again later.
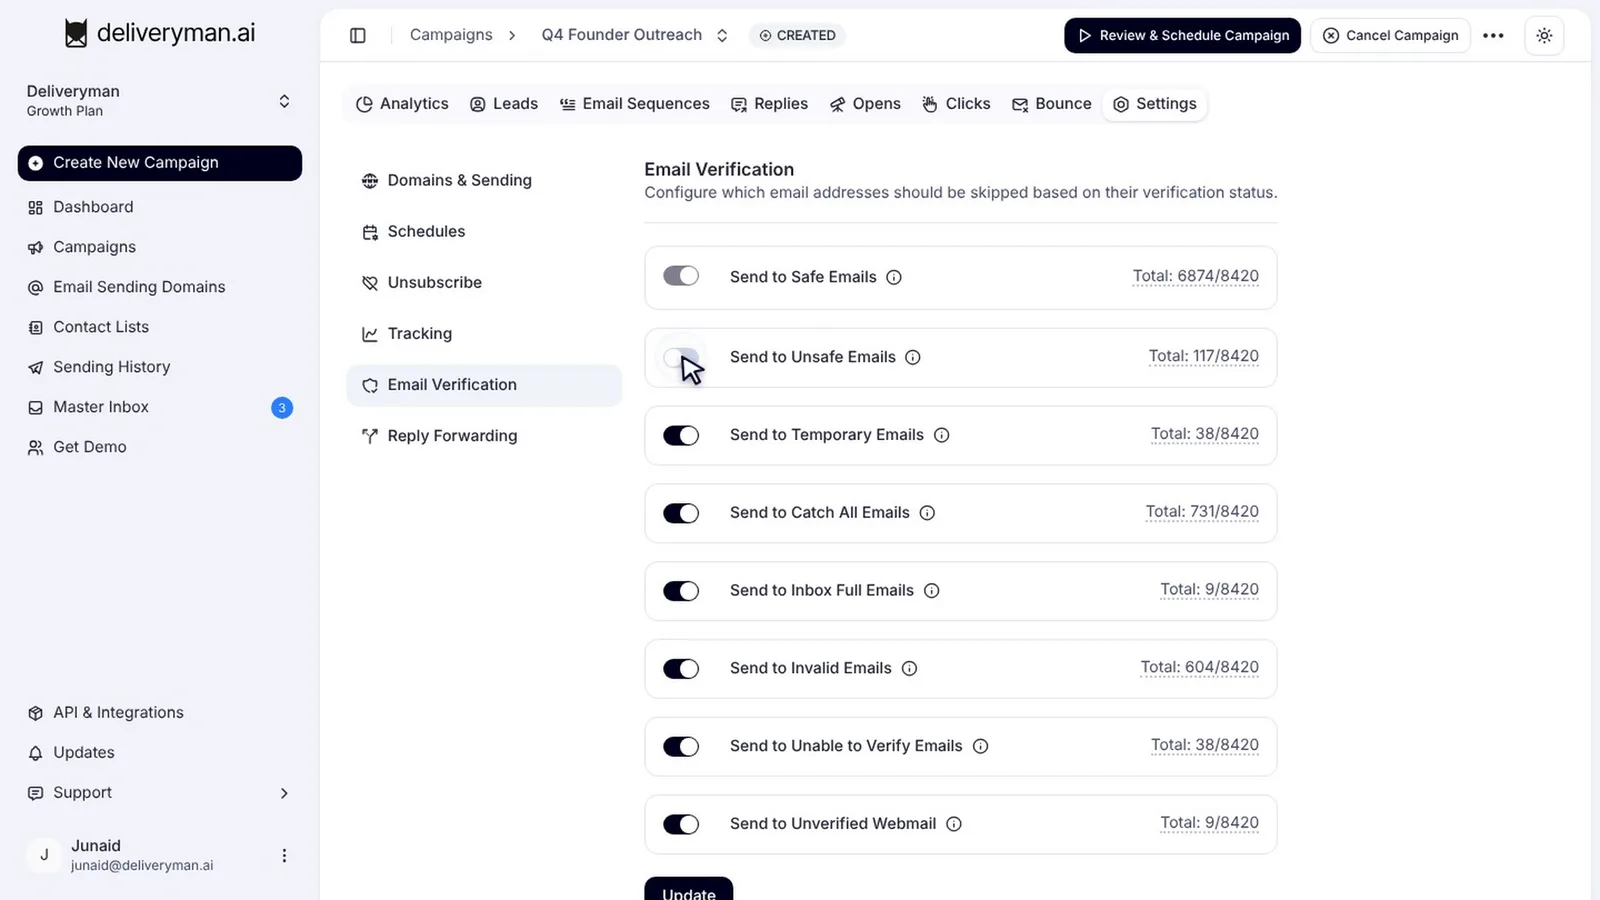
A sensible starting point:
- Always send to Safe To Send.
- Always skip Email Doesn’t Exist, Not Email Format and Unsafe to Send.
- Skip Temporary Email and Inbox Full on new or sensitive domains.
- Decide on Catch All and Unable to Verify based on your list. Small, high-value lists can be worth the risk; large, cold lists usually aren’t.
Email verification best practices
- Verify right before you send, not when you first build the list.
- Use Deep Verification for any list you haven’t emailed before.
- Watch your bounce rate in campaign analytics. If it climbs, re-verify the list and tighten your skip settings. Our guide to cold email campaign analytics shows where to find it.
- Never buy lists. Purchased lists are full of dead and trap addresses that verification can’t fully rescue.
- Combine verification with warmed-up domains. Clean data and a trusted domain work together. See how to warm up your domain for cold email.
Frequently Asked Questions
Is email verification really unlimited?
Yes. Every Deliveryman plan includes unlimited email verification, with no credits and no per-email fees. See the plans on our pricing page.
How long does email list verification take?
Quick Verification usually takes 5 to 30 minutes. Deep Verification usually takes 20 minutes to 3 hours, depending on the size of the list and how many addresses need retries.
Should I send to catch-all emails?
Catch-all domains accept every address, so the mailbox can’t be confirmed. Some are real, some will bounce later. Skip them on large or new campaigns, and consider sending only when the lead is valuable and your domains are healthy.
Do I have to re-verify a list before every campaign?
It’s the safest habit, because lists decay over time. Since verification is unlimited, there’s no cost to running it again.
Next steps
Once your list is clean, you’re ready to build the rest of your campaign. Follow our step-by-step guide on how to set up a cold email campaign, or see pricing to start verifying your lists today.