
Every cold email campaign comes together from four parts: who you’re emailing, what you’ll send, where it sends from, and when. Get those four right and the rest is mostly waiting for replies.
This guide walks you through how to set up a cold email campaign in Deliveryman AI, from a blank page to launch, with the settings worth checking at each step. Prefer to watch? The full walkthrough is below.
Before you start
You’ll get the best results if three things are ready first:
- A verified contact list. Bounces hurt your sender reputation, so verify the list before you send. Our guide shows how to verify your email list.
- Warmed-up sending domains. New domains need to build reputation before they send cold email. See how to connect your domain and create mailboxes and how to warm up your domain.
- A clear offer. Know who you’re writing to and what you want them to do: reply, book a call or look at something.
How to set up a cold email campaign in Deliveryman AI
Step 1: Name your campaign
Click Create New Campaign in the sidebar. Give the campaign a name you’ll recognise later, for example the audience and the quarter, then click Next.
Step 2: Choose who you’re emailing
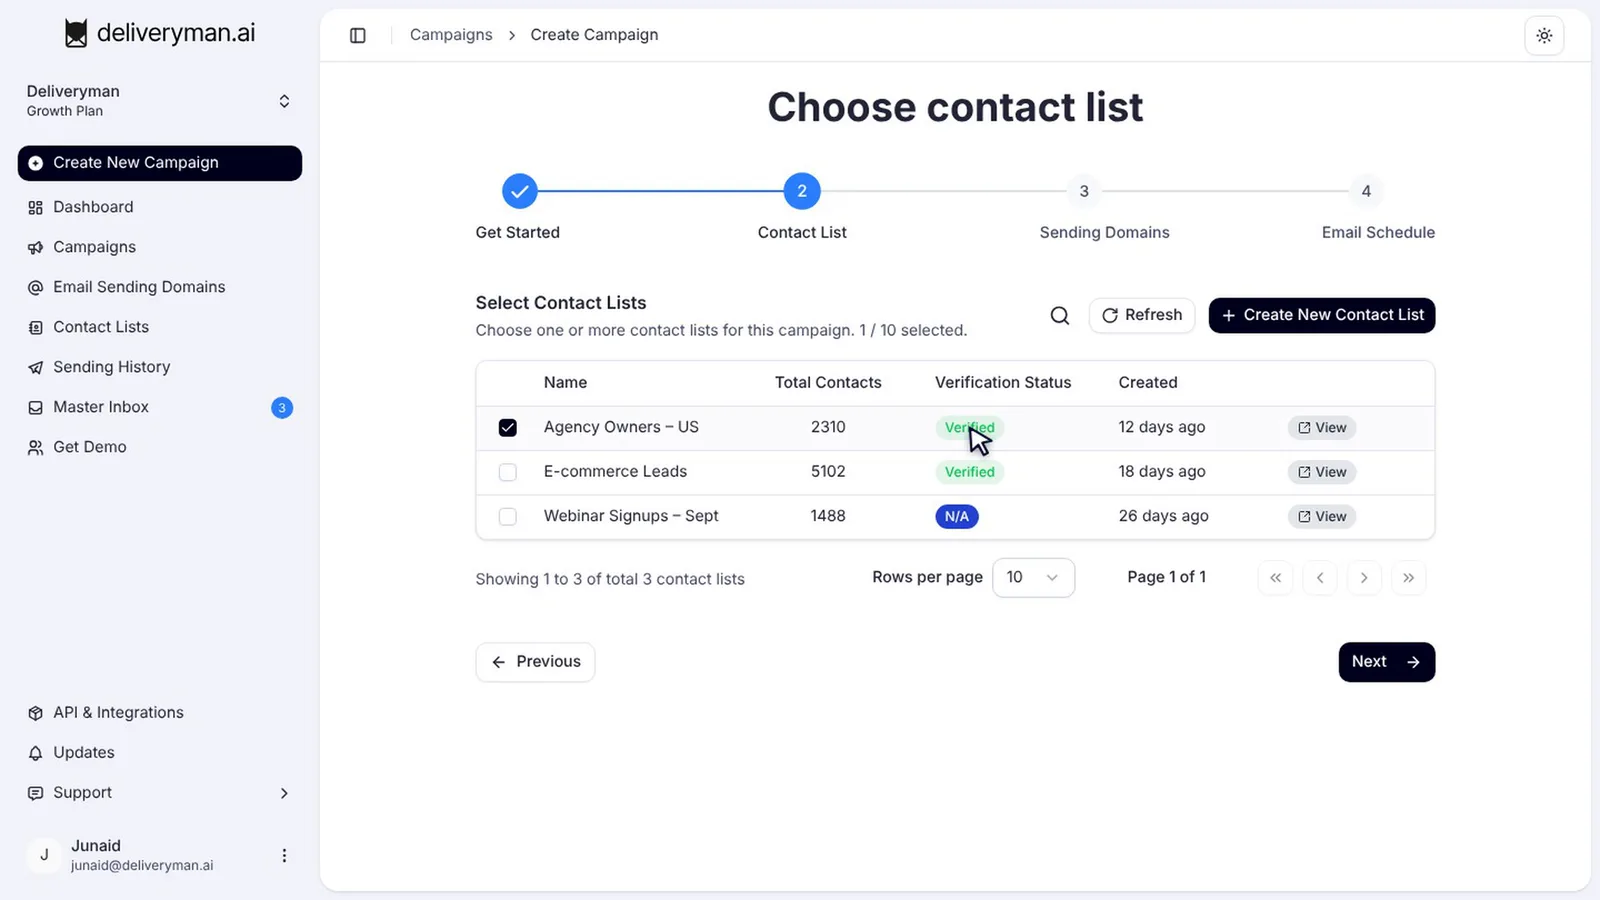
Select one or more contact lists, up to ten per campaign. Verified lists show a green badge, so you know they’re clean before you send. Click Next.
Step 3: Pick your sending domains and daily limit
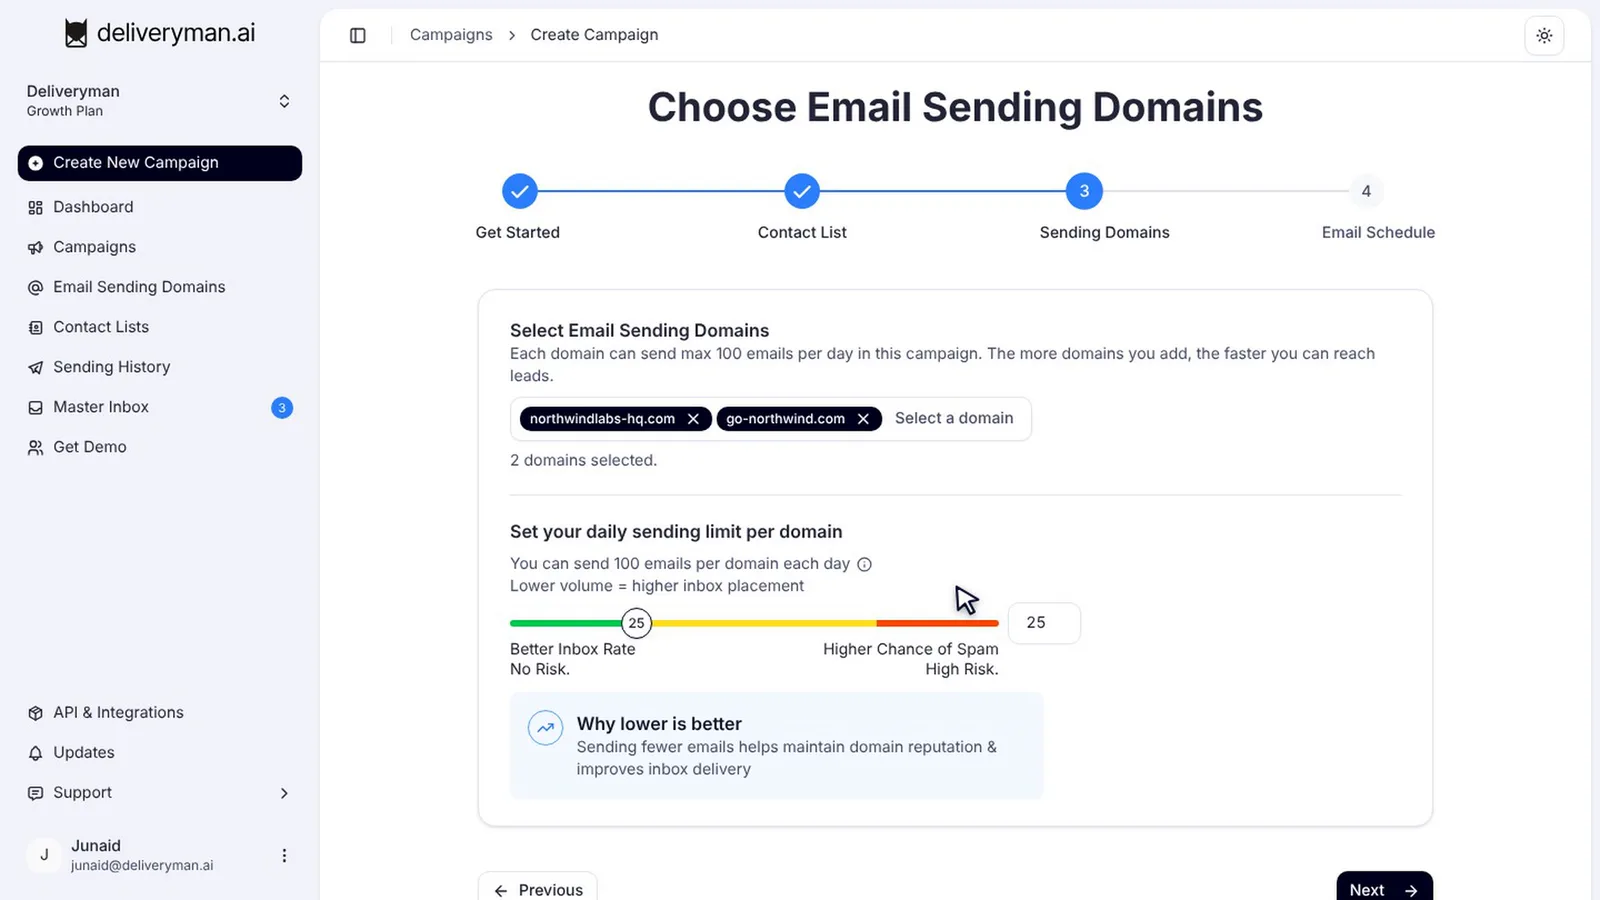
Select your sending domains. The more domains you add, the faster you can reach your leads, because each domain sends its own share.
Then set a daily sending limit per domain. Each domain can send up to 100 emails a day, but lower volume means better inbox placement. In the walkthrough we keep it at 30 per domain, a comfortable starting point.
Step 4: Choose your sending schedule
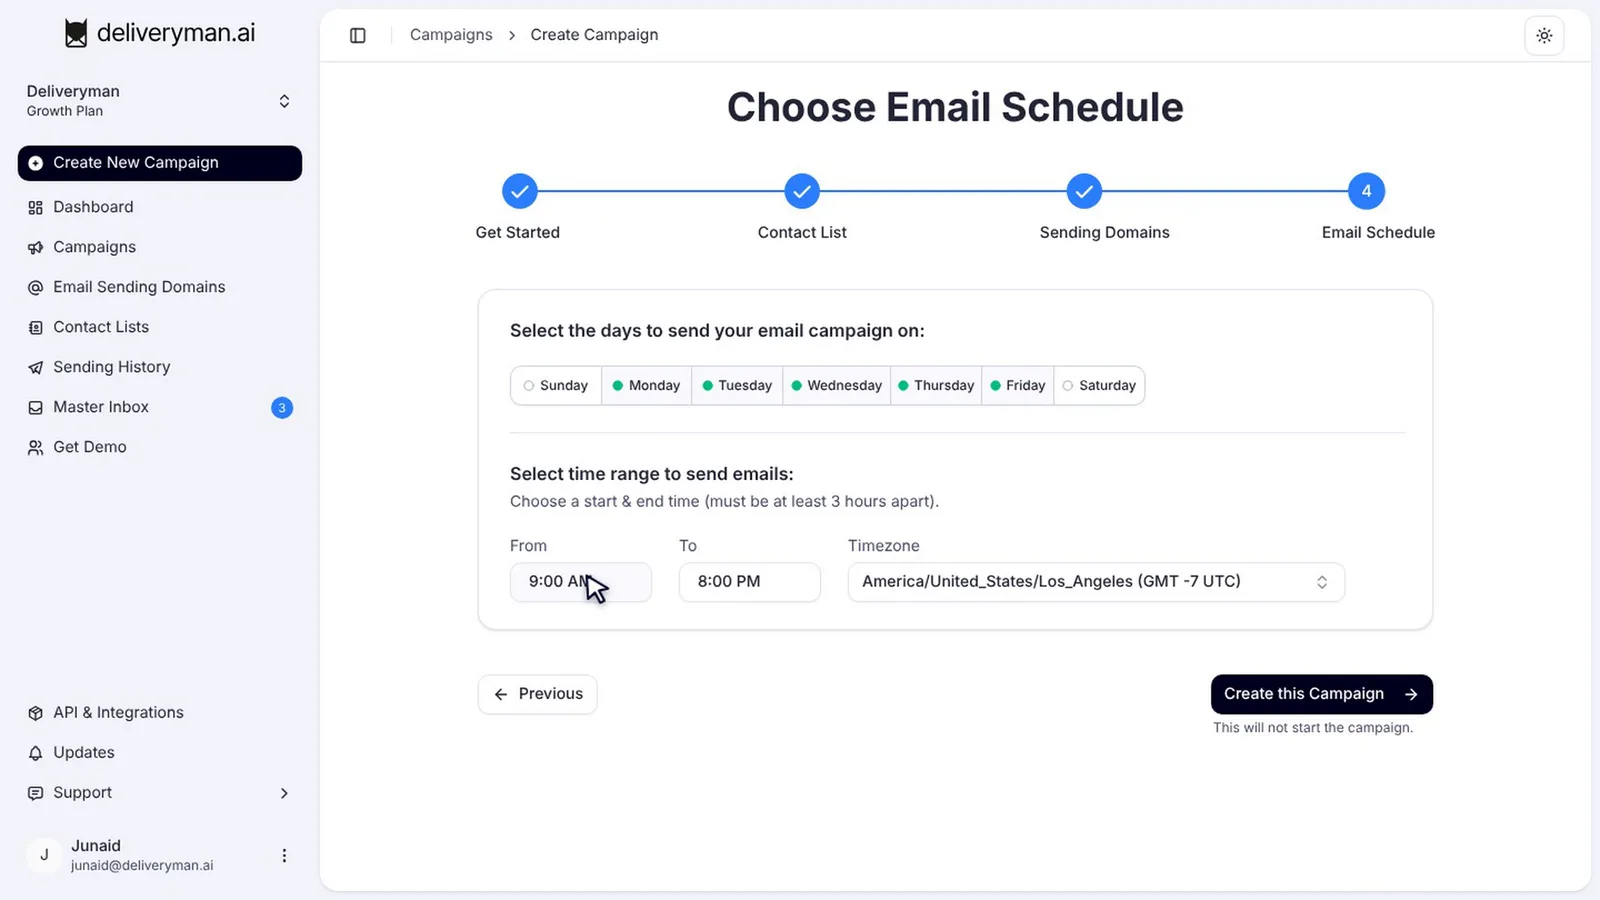
Choose the days and hours to send, and your time zone. Weekdays during business hours is a good start, because it looks like a real person’s outbox. Then click Create this Campaign. Don’t worry: this doesn’t start sending yet.
Step 5: Write your first email
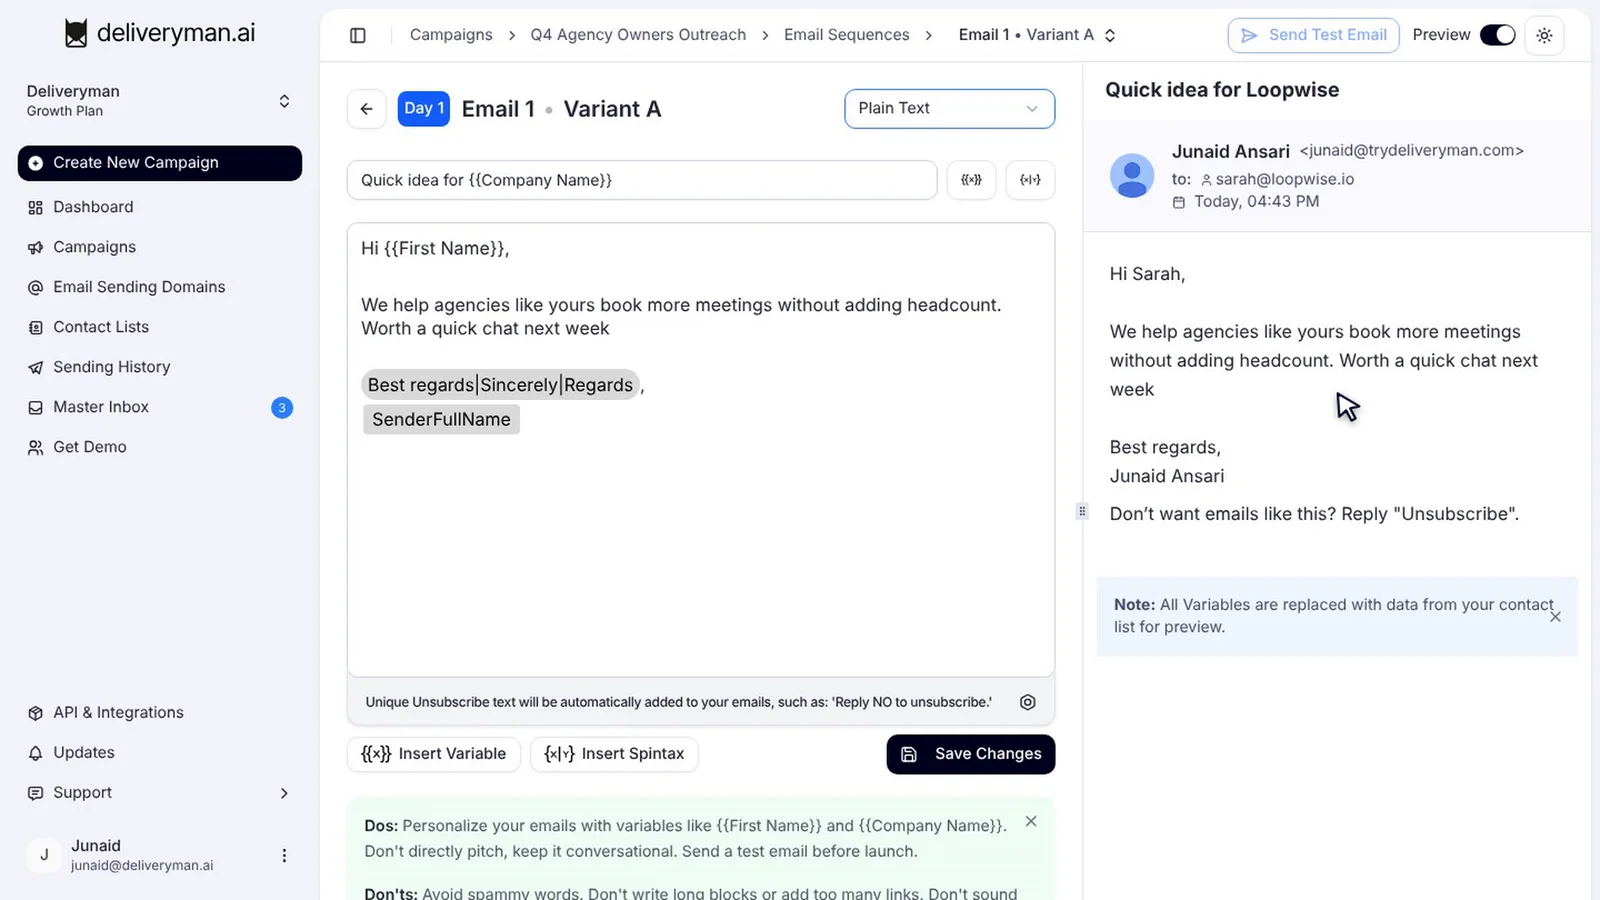
Your campaign now shows up in Campaigns. Open it and go to the Email Sequences tab. Click Add Email Step, then Edit to write your first email.
Add a subject line and your message. Use Insert Variable to personalise it with details like first name or company, and check the live preview on the right. Then save your changes.
Step 6: Add a follow-up
Add a follow-up the same way and set how many days to wait before it sends. Want to test different versions of each email? Our guide to cold email sequences and A/Z testing covers variants, spintax and threading in detail.
Step 7: Review your campaign settings
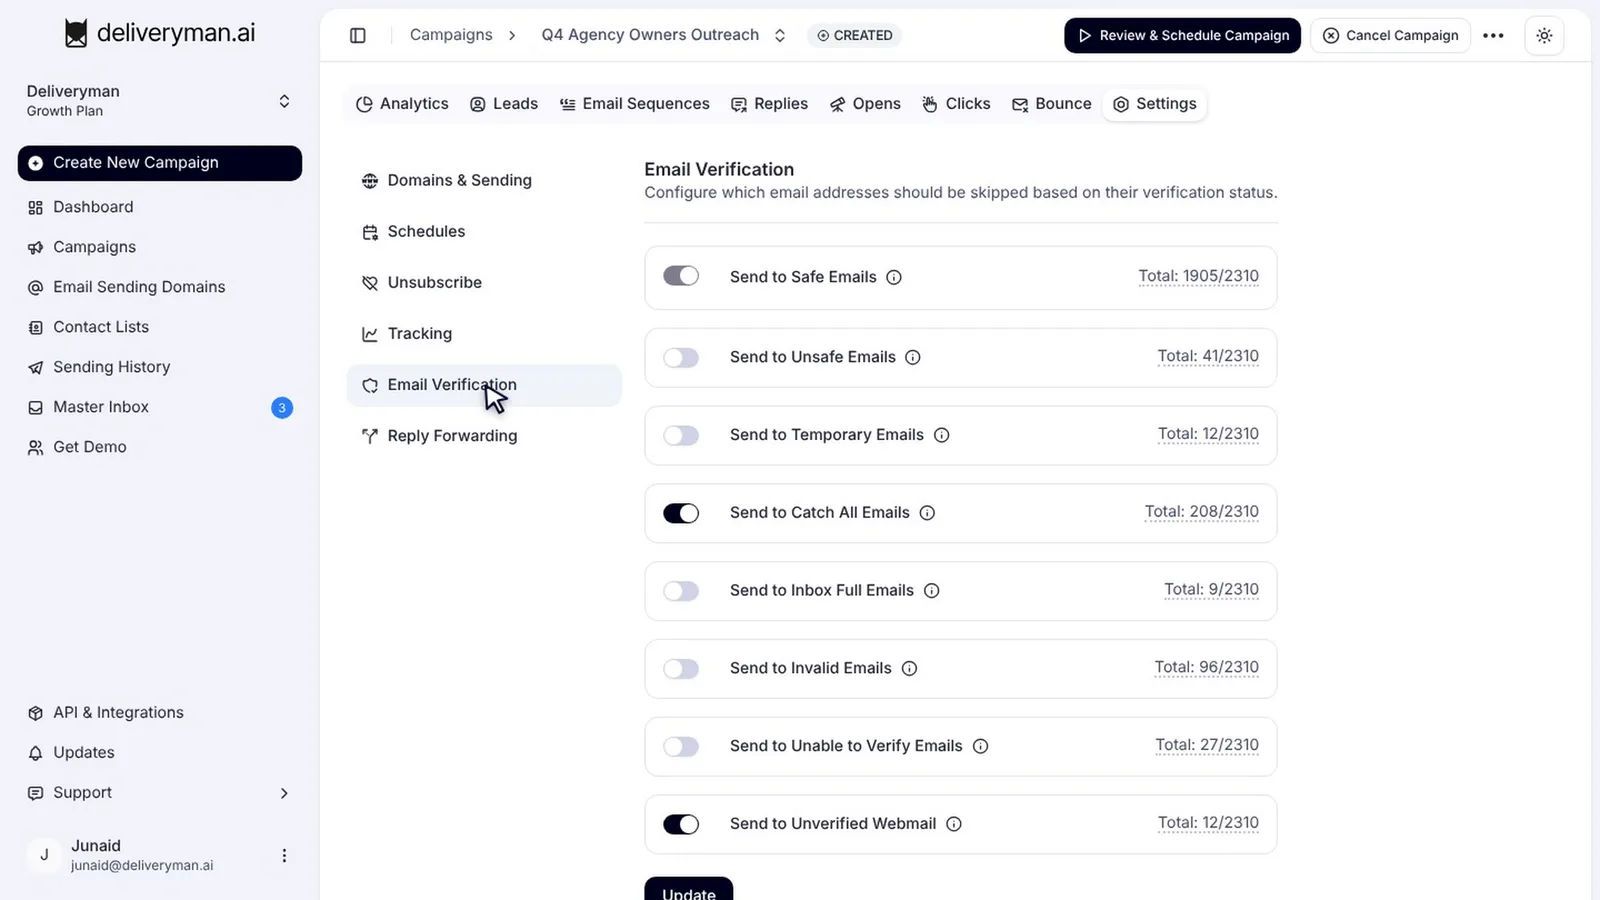
Before you launch, open the Settings tab. Here you can change:
- Domains & Sending: your domains and daily limit.
- Schedules: sending days, hours and time zone.
- Unsubscribe: your unsubscribe text.
- Tracking: open and click tracking.
- Email Verification: which verification statuses to send to or skip.
- Reply Forwarding: where replies get forwarded.
A note on tracking: open tracking adds a tracking pixel to every email, and link tracking rewrites your links. Both can affect deliverability, and open data is noisy anyway. Deliveryman filters out bot opens so the numbers you see are more trustworthy. Read why your open rate may be lying to you.
Step 8: Review, pick a strategy and launch
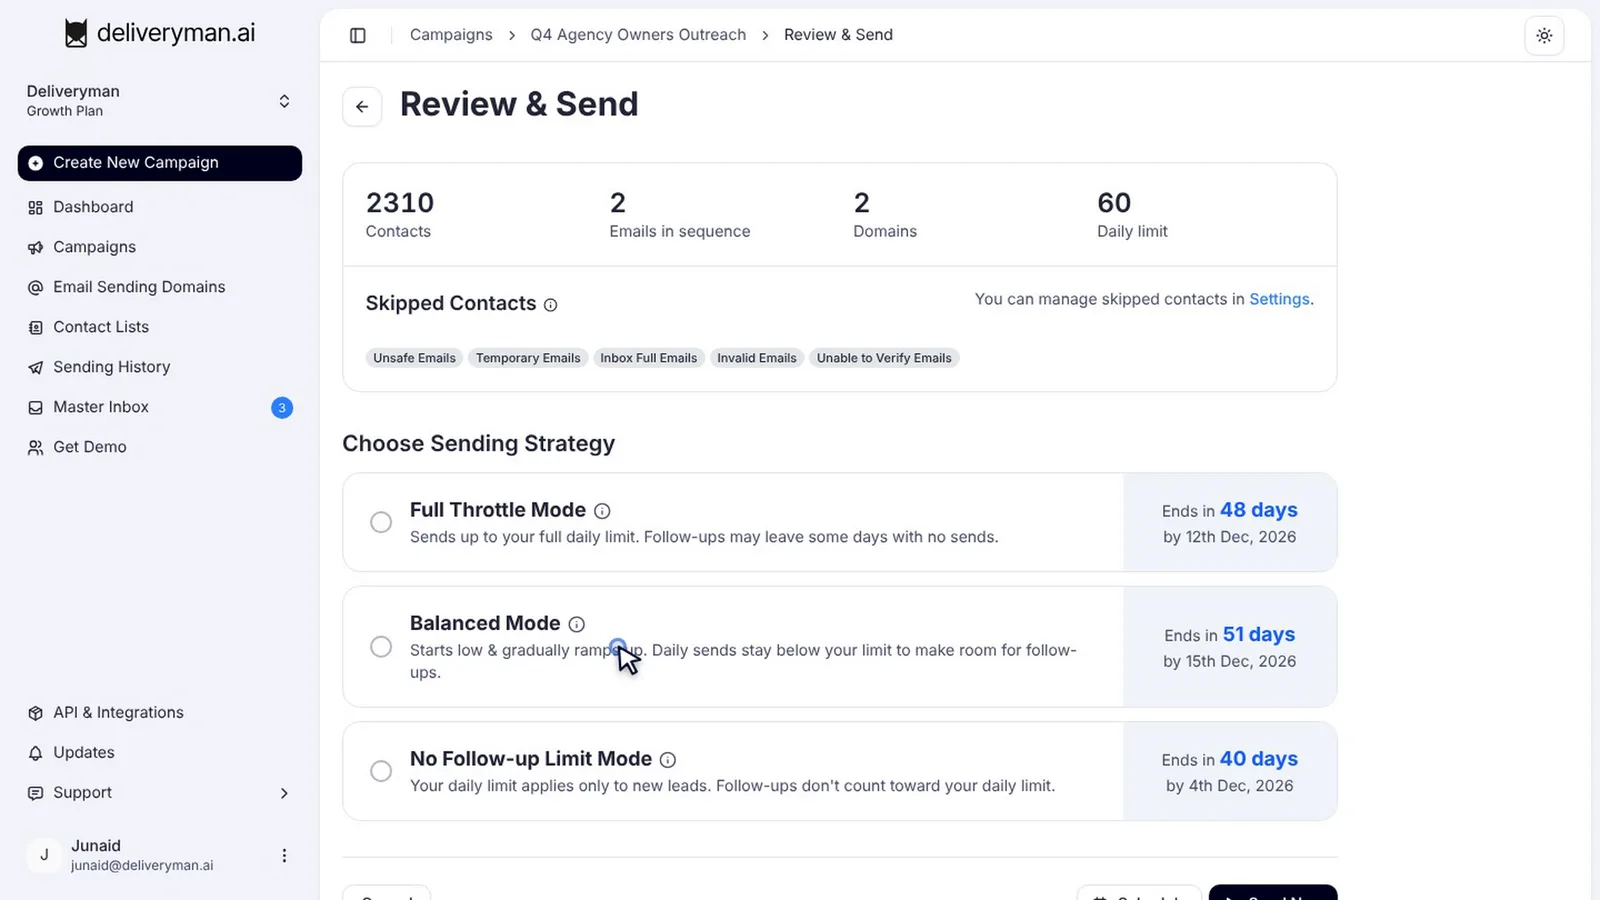
When everything looks good, click Review & Schedule Campaign. Check the summary: contacts, emails in the sequence, domains and daily limit. Then pick a sending strategy:
- Full Throttle sends up to your full daily limit, shared between new leads and follow-ups.
- Balanced starts low, ramps up gradually and keeps room in your daily limit for follow-ups.
- No Follow-up Limit applies the daily limit to new leads only, with follow-ups sent on top.
Not sure which to choose? Our guide to cold email sending strategies compares them with sample schedules. Then click Send Now and Proceed. Your campaign is live.
Cold email campaign checklist
| Part | What to check |
|---|---|
| Who | Verified contact list, the right audience, no purchased data |
| What | Short first email, two or three follow-ups, personalisation that fills in correctly |
| Where | Warmed-up domains, a modest daily limit per domain |
| When | Weekdays, business hours, your audience’s time zone |
| Settings | Verification skips, unsubscribe text, tracking choices, reply forwarding |
Frequently Asked Questions
How many contact lists can I add to one campaign?
Up to ten contact lists per campaign.
How many emails can each domain send per day?
Up to 100 emails per domain per day. Lower limits usually mean better inbox placement, so many senders start around 30.
Does creating a campaign start sending?
No. Clicking Create this Campaign saves it as a draft. Nothing is sent until you review the campaign, pick a sending strategy and click Send Now.
Can I change settings after launch?
Some settings lock while a campaign is running. Our guide to cold email campaign analytics and managing a live campaign explains what you can and can’t change.
Next steps
Once replies start coming in, you’ll handle them all from one place. Learn how to use the cold email master inbox to read and answer every reply, or see pricing to launch your first campaign.